Randy's pages... |
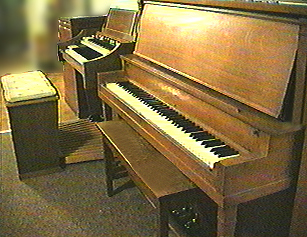
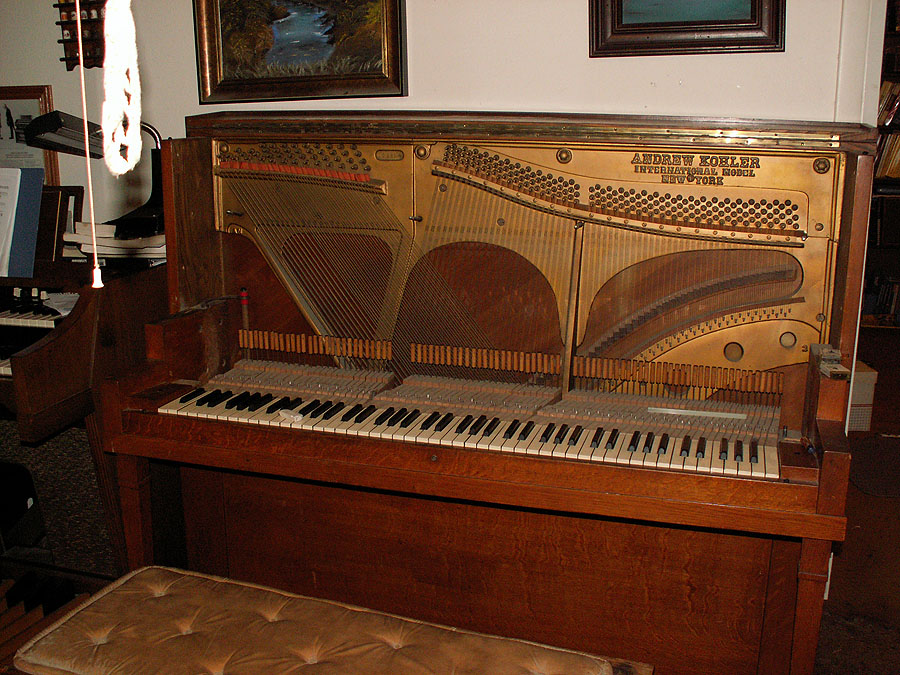
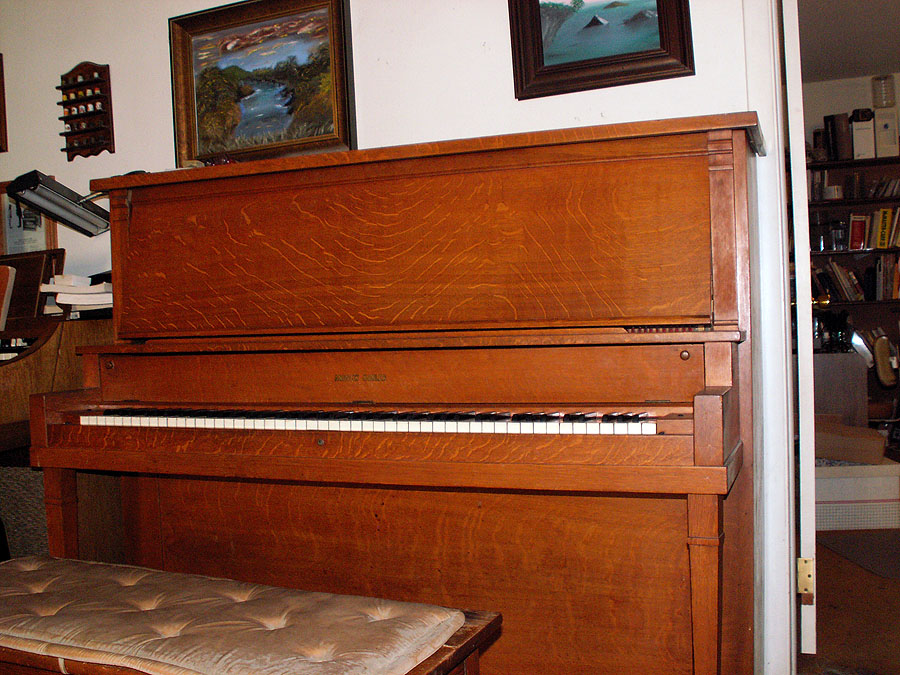
Andrew Kohler International ModelCir. (approx.) 1908We're all old - but still hanging in there. |
My birthday present to myself -
|
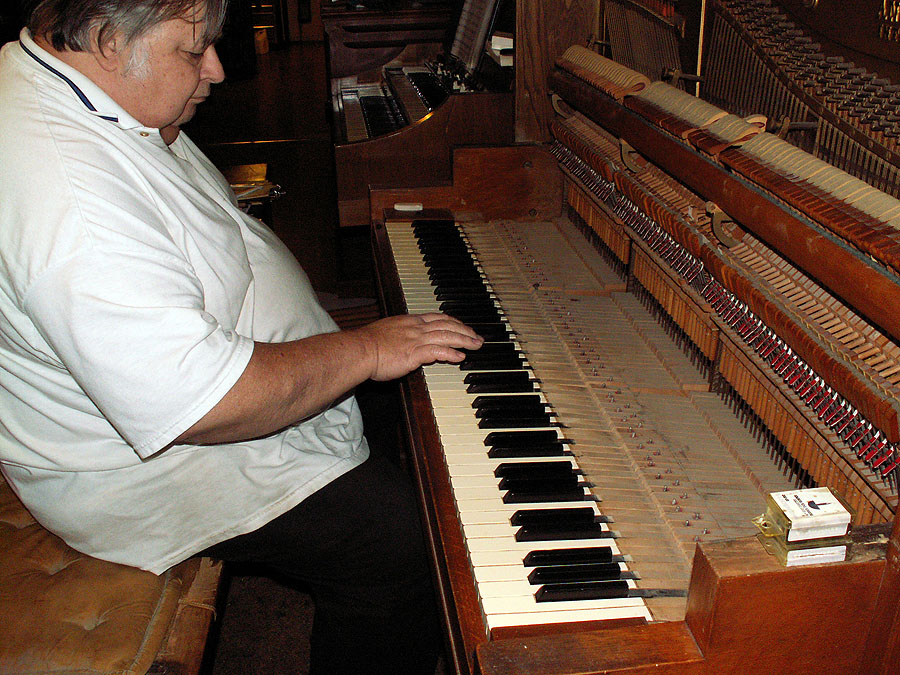
| On my main page you met my piano - an old Andrew Kohler upright that is so old - no one knows for sure just exactly how old it really is. |
|
As I mentioned before - it's true age is a puzzle- and while there is a "story" of how (or more precisely when) this piano came to be- from a "factual" standpoint - we're still guessing While "the story" is just that - I've found some other Andrew Kohlers who's age is known. A player version of the
 "International" has been found and documented that had it's original sales receipt inside. Though that piano has "Andrew Kohler San Francisco" on the harp - otherwise - the cabinet is a dead ringer for this one - save for the player mechanism access doors in the music desk and the bottom front cabinet. The receipt was dated 1916 - some 8 years "newer" than this one is believed to be - and according to all accounts - just a couple years after Andrew Kohler manufacturing resumed in San Francisco. "International" has been found and documented that had it's original sales receipt inside. Though that piano has "Andrew Kohler San Francisco" on the harp - otherwise - the cabinet is a dead ringer for this one - save for the player mechanism access doors in the music desk and the bottom front cabinet. The receipt was dated 1916 - some 8 years "newer" than this one is believed to be - and according to all accounts - just a couple years after Andrew Kohler manufacturing resumed in San Francisco.
Whatever it's true age - fact is - over the past 55+ years I've owned the piano - it has had a LOT of use... And like all things mechanical - that use comes with "the price" of wear and tear. Recently - bridle-straps have been breaking at an alarming rate - just a few days ago - two within minutes of each other. A broken bridle strap won't keep a piano from playing - but it can and will cause it to mis-behave. The "prop-up" mechanism that pushes the back of the music desk out so music will "prop-up" better has long been broken - which means something had to "block" it up - to both better support music - and allow more sound out. The "top" Eb hammer stem broke sometime ago - obviously that key no longer sounds... High "C" has stopped working - with the key "locked" in the up position (i.e. can't be pressed any). Last week - the "G" above middle "C" started sticking "down" - sometimes such is caused by a broken bridle strap - however this time - it proved to be more serious. And the sustain pedal sounds like sawing wood... some grommet has worn through letting the wood drag against metal... |
|
|
| So - with a little time over the Christmas holidays - I've decided it's time give my "old friend" - some TLC - and in the process - make playing even more enjoyable for myself. SO! as anyone who knows me knows - NO ONE can get to the heart of the matter (ripping things apart, that is) faster than I can... |
|
 |
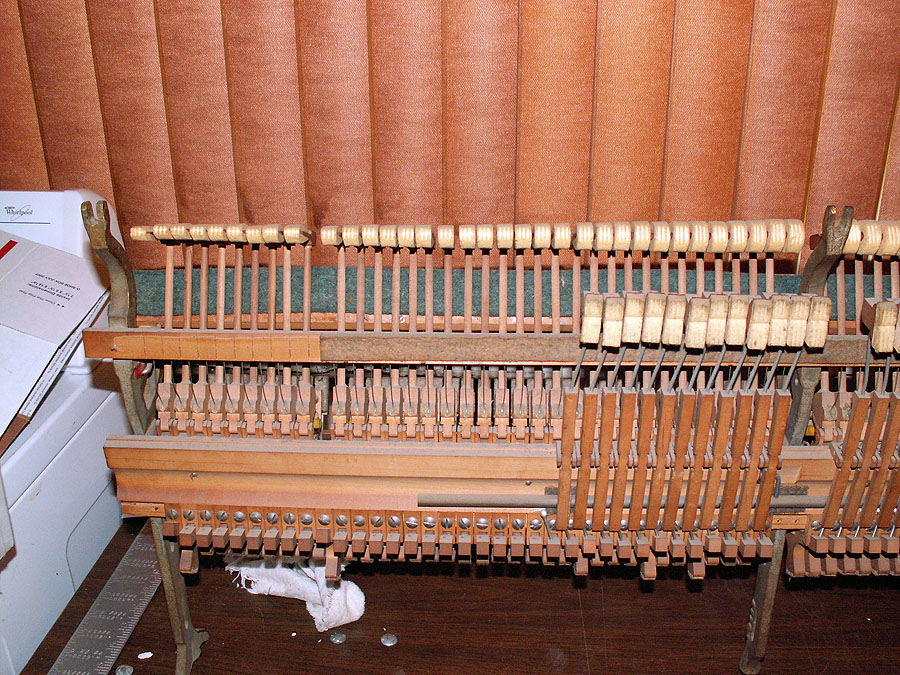
| With the music desk, music desk back board and keyboard cover removed - the action comes out by removing only four large "nuts" that secure the top of the action irons. As can be seen - these Andrew Kohlers use "capstan" push-rod type lower mechanisms to "transfer" key motion to the action. This makes setting key heights and taking out "lost motion" a breeze. |
|
|
 |
| Easy repair here - a new piece of felt is inserted in to the sustain pedal push-rod support - and glued in place. One "noise" gone. |
|
|
 |
|
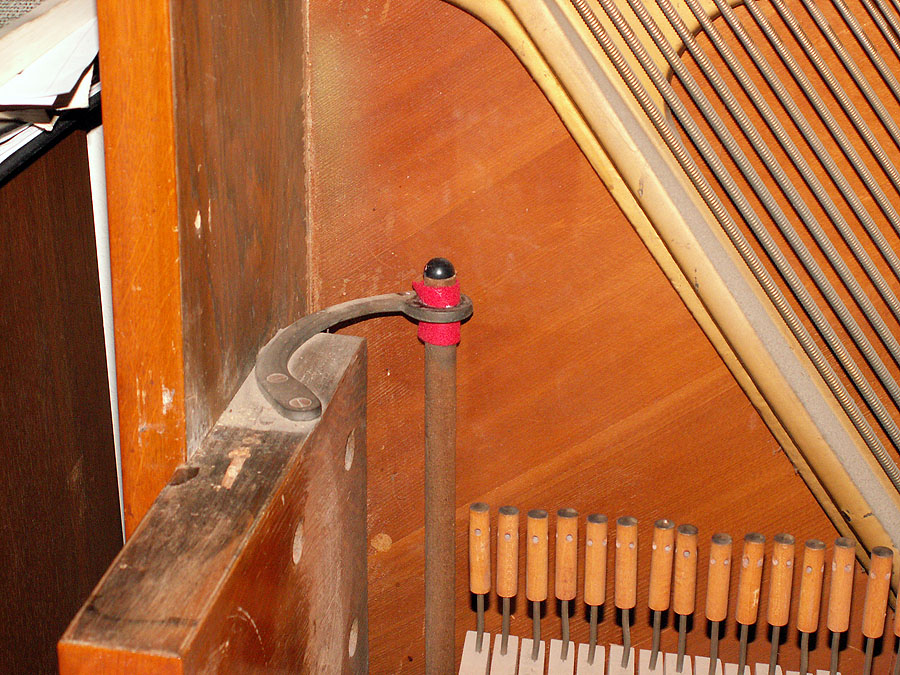
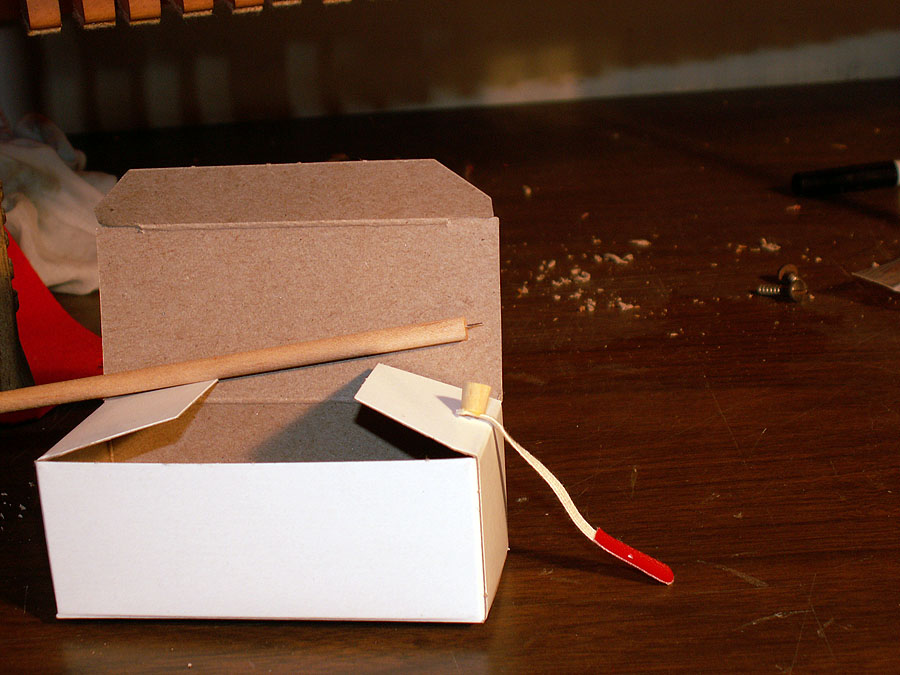
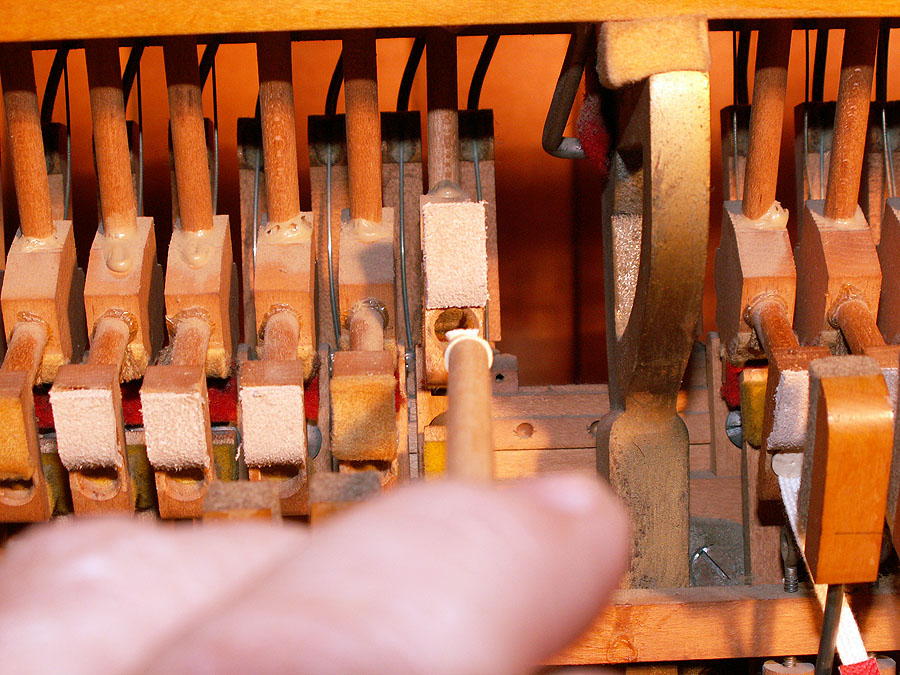
This is the "new" business end of the pusher mechanism that pushes out the bottom of the music desk back board when the key board cover is "folded" back from over the keys. This part had broken off about even with the top of the music desk.
|
|
|
 |
|
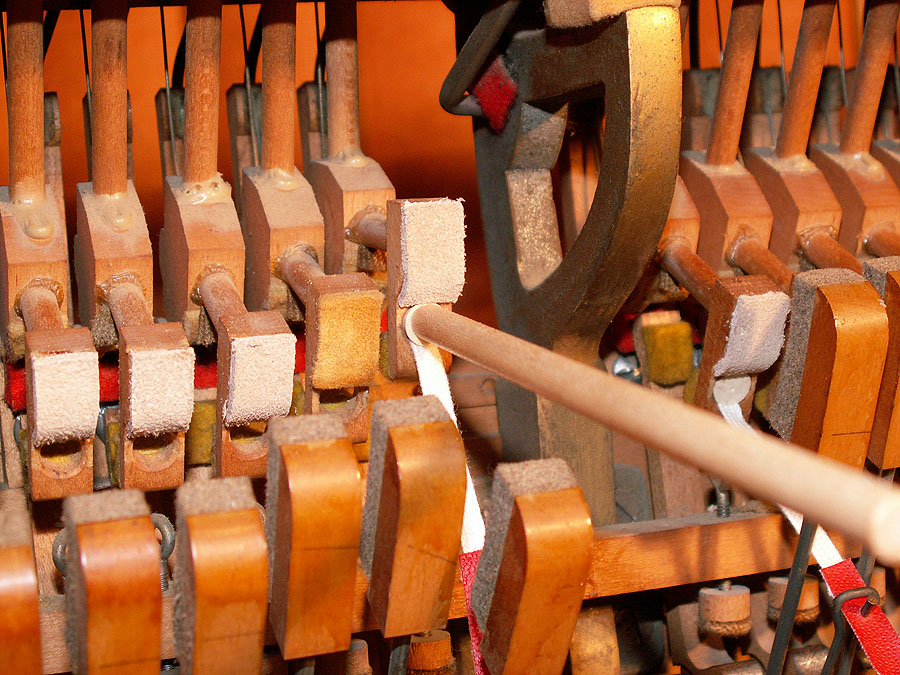
From the "under side"... The new replacement pusher. Cut from a nice piece of very good old growth hardwood (thanks Frank!) with new felt - it works great!
|
|
|
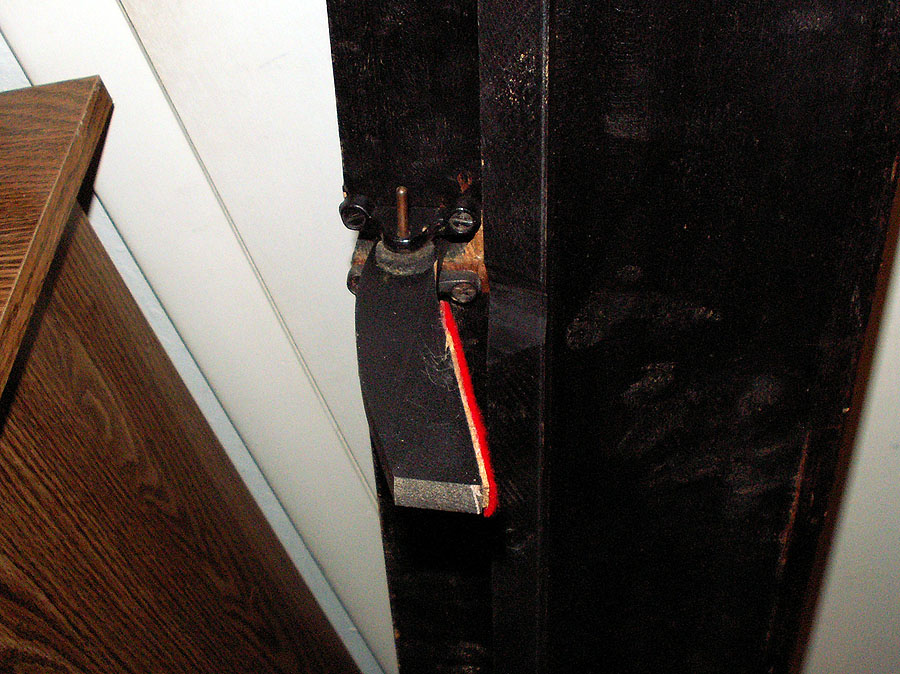 |
| Another view of the new pusher. |
|
|
 |
|
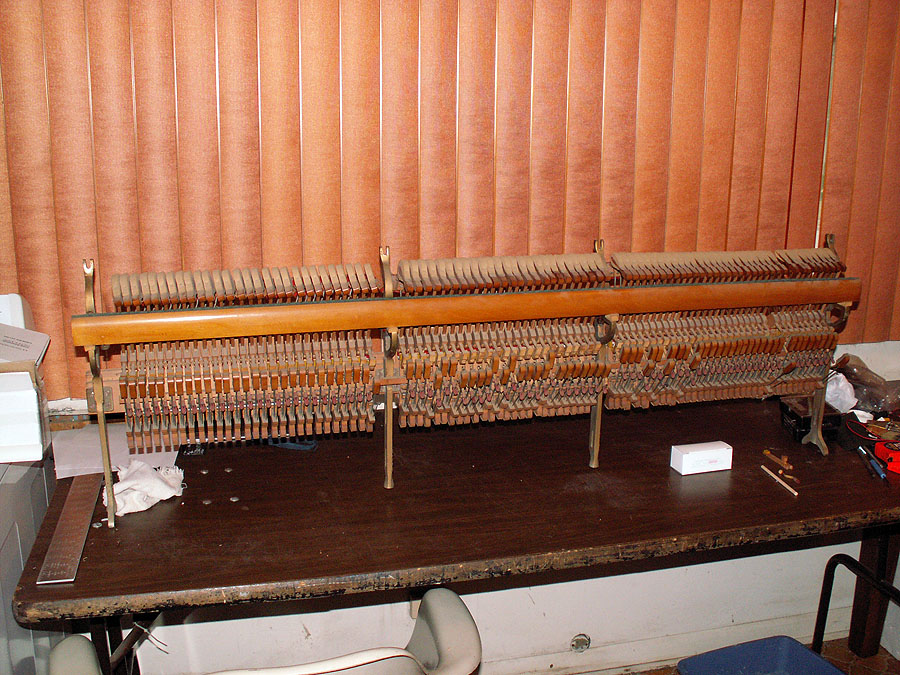
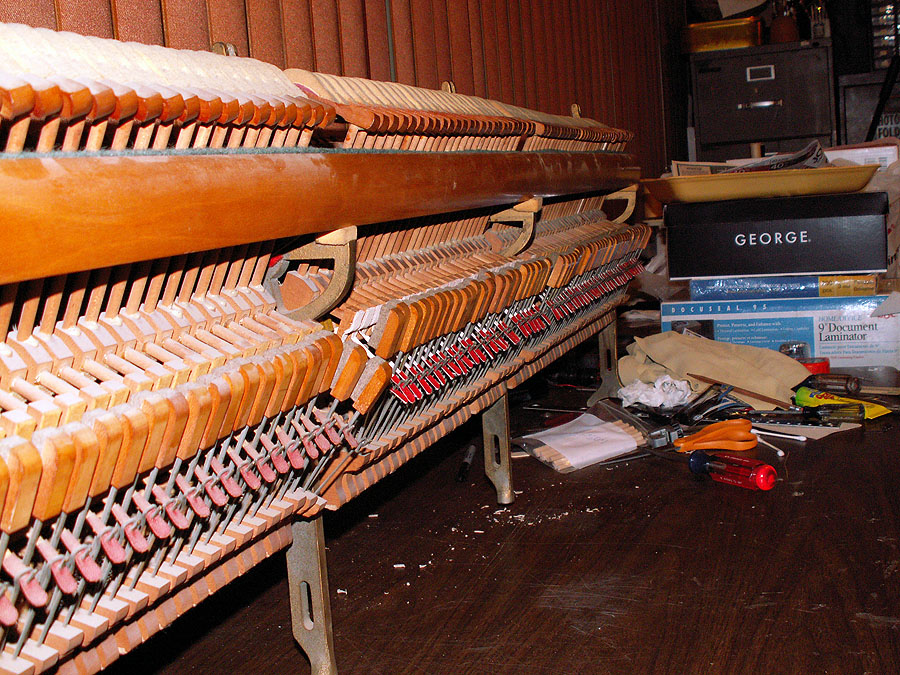
The action on the service bench.
|
 |
|
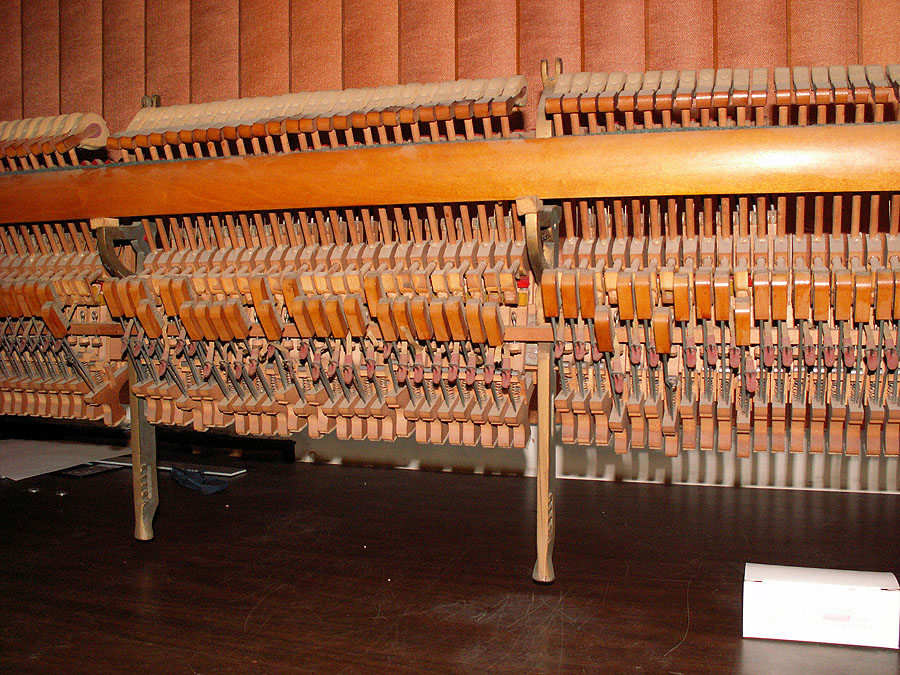
Closer look at the action - note the many "out of line" (dropped down) Wippens (the lower parts at the bottom of the springs)- broken bridle straps allow the wippens to swing down further than where they belong. In the piano - the keys keep the wippens from dropping so low - but it's still not good on some of the action parts. The main issue with broken bridle straps are that the hammer isn't pulled back from the strings - and allowed to "bounce" too much. This makes it difficult to play notes fast - as gravity alone takes to long to "restore" the action ready for the next note.
|
 |
|
The action from "the string side"... Bass section. Some wear on these hammers from striking the strings - but not too bad. The dampers (the smaller felts below the hammers that "silence" the strings) are also in pretty good condition Nothing serious here.
|
|
|
 |
Mid section of hammers. Here some of the hammers have some pretty nasty wear - some worn so bad they no longer have grooves - just a lot of missing felt where the grooves used to be. I'll try and do some re-shaping here and salvage the best I can - these really should be replaced. However - at around $150 - $250 a set - new hammers will have to wait until another time.
|
|
|
 |
|
Treble section. Here - like the bass - some wear but not too bad. Note missing hammer - that stem broke some time ago. In examining high "C" - found a failed glue joint where the jack's "flange" attaches to the top of the wippen.
|
|
|
 |
|
The flange has been re-glued to the wippen - and allowed to cure over night. That fixes high "C".
|
|
|
 |
|
After some careful work - the broken stem is removed from the hammer and butt - and a new stem measured, cut and fitted. First the new stem is glued to the hammer and allowed to cure over night. Then the hammer butt is installed back on the rail - glue applied to the stem, inserted into the butt and then it (and the hammer) are carefully set for height, alignment, etc. and allowed to dry and cure.
|
|
|
 |
| More trouble: The felt (buckskin) is badly worn on many catchers. These will have to be replaced. |
 |
| Most of the middle section - and several in the other sections needs replacement "patches" - so replaced. Here I'm checking to make sure the bottom of the buckskin is "tucked in" - and well clear of the bridle strap holes. |
|
|
 |
| Buckskins trimmed and bridle straps installed. All except "G" above middle "C". That problem has turned out to be more serious that "just" a broken Bridle Strap... The wippen's flange "bushings" are worn - or damaged to the point they need to be replaced. I was going to just "swap" with a much-less used key's wippen - but it turns out all the keys in the other two sections have their damper "spoon" drilled right 45 degrees - while the middle section is drilled 45% left. Since I don't want to put this "back" in the middle section - the whippen flange will have to be replaced. |
|
|
 |
| Looking down the action - note the wippens are now level. |
|
|
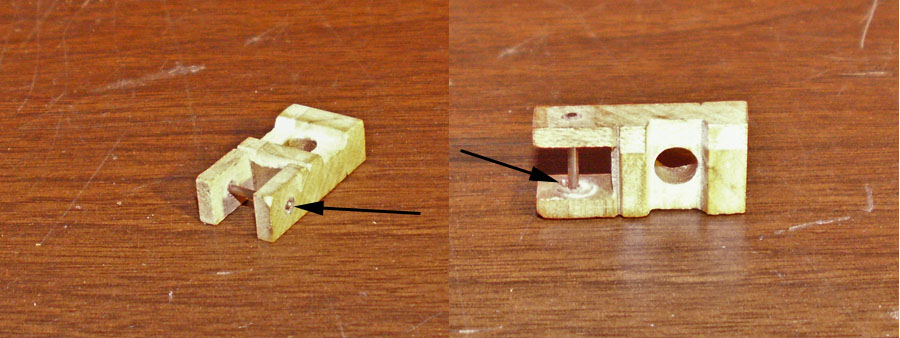 |
| The worn-out flange from the "G4" wippen. The arrows point to areas of damage / excessive wear. |
|
|
 |
| The replacement flange. I really didn't figure I'd have much luck finding one in Meridian, on a Holiday - but thanks to Dave Ethridge (local piano technician) for coming through with the parts. Super nice guy - I'd reccomend him for any piano needs - from a simple tuning - to complete overhaul. Here: the new flange has been installed on the wippen; -- and is being checked for clearance with it's neighbor and operation of the damper spoon. |
|
|
 |
|
This stem has been "modified" to become a cork insertion tool. You can buy these commercially - but since I have several spare hammer stems - I just drilled an approriate sized hole - and then inserted a small sewing needle. The needle then is used to "spear" a cork - then the cork is installed into the hole in the bottom of the catcher. This the strap allows the hammer to hit the strings - but not be "locked" up against them.
|
|
|
 |
| Using the "insertion tool" to stuff a cork into a hole. |
|
|
 |
| Pushing the cork firmly until seated... |
|
|
 |
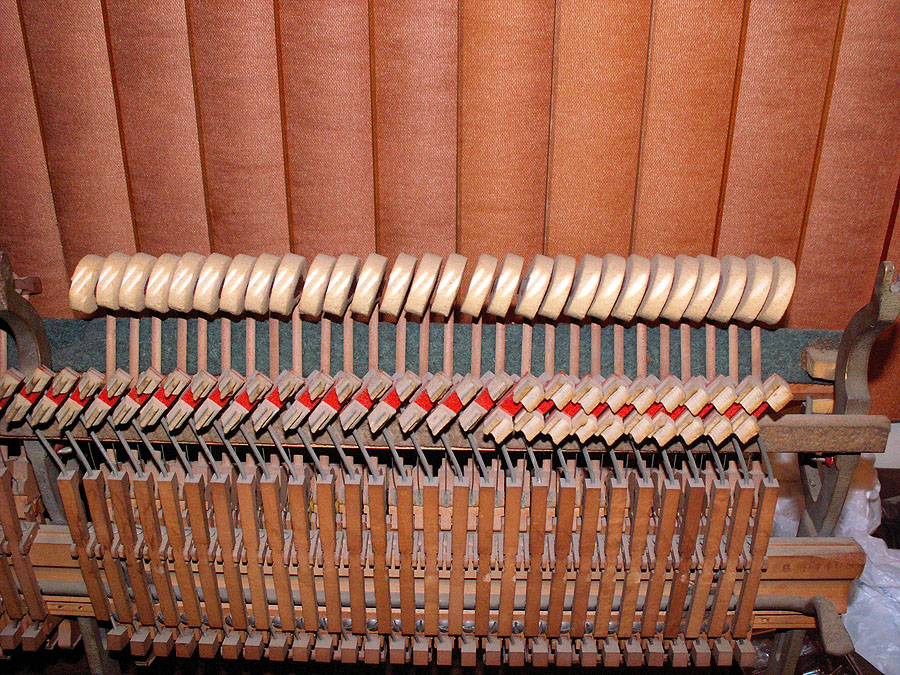
| Installed cork - above Fully installed bridle strap above. |
|
|
 |
| Action back in the piano - installing one of four large nuts that hold the irons. |
|
|
 |
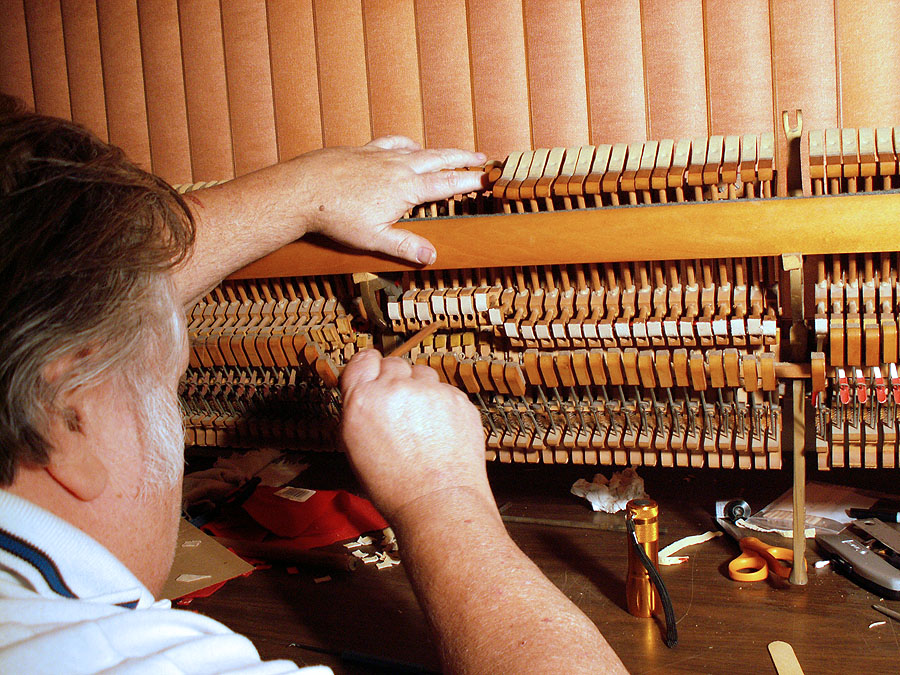
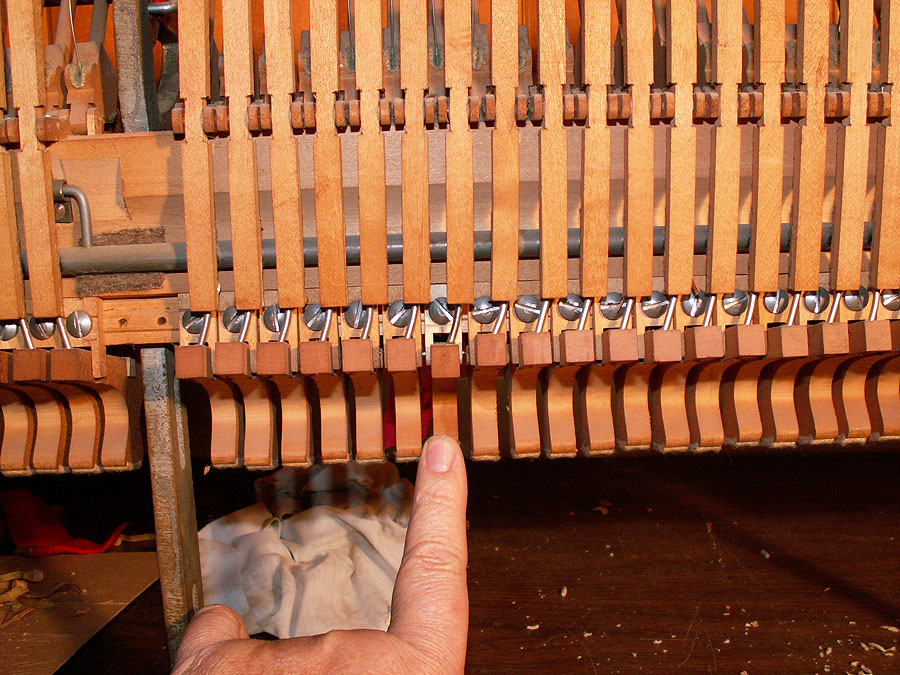
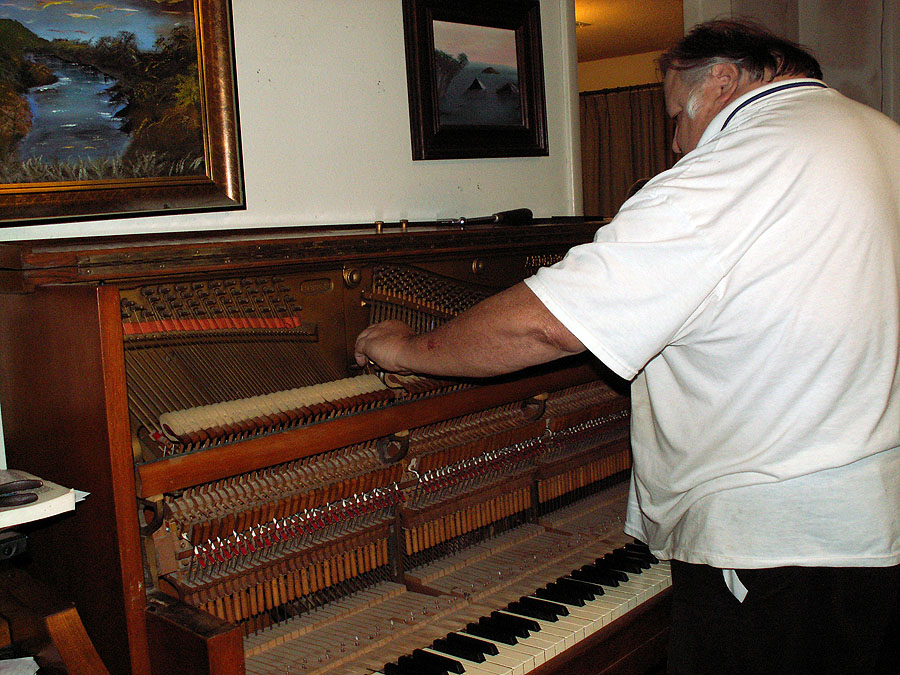
| Checking each note for issues... Only a few found: some slight adjusments to a few dampers; a couple of hammer fall alignments; etc. |
|
|
| Update 12/31/11
Last day of the year - a nice day to tune a piano... Well - it's almost 4PM... The piano is "half-tuned"... I'm not sure how that should apply - while I am half way done (top half) --I've never been happy with my own tuning... but none-the-less - the top-half is reasonably tuned. For one thing - I've learned to trust my Conn StroboTuner... The one time a pro tuned my piano that I didn't like his tuning - the guy used a StroboTuner - and the "stretch" on the high end was WAY too stretched... way sharp. Since then - I had blamed the "reccomended" stretch settings in the manual as the cause - so I'd just tuned the top strictly "by ear". Problem is - it's really hard to hear some of the beats in the top octaves. This time I decided to try the stretch table in the StroboTuner manual - and while not perfect (mostly due to my fault, not the tuner) it sounds pretty good. Then again - the old ears ain't what they used to be! I'd probably be done tuning by now except for a careless accident - Since the StroboTuner wasn't "hearing" the top octave too well - I'd taken the microphone out of the case to sit closer to the strings. After finishing the top octave - I sat it up on the lid (instead of putting it back in it's holder) - only to have it slide off - taking two hammers with it as it made it's way towards gravity. So - two hammers "de-stemmed" and re-bored; two hammer butts "de-stemmed" and re-bored; two stems cut to length and glued to their hammers and set aside to dry over night. I'll re-install the hammer butts in a bit - then tomorrow I'll glue the stem/hammers back in - aligning the hammers against their neighbors and the their strings. Stupid move - cost some time. I'll start back tuning after a break... (sigh)... Interesting discovery, though - Sherry was looking over the old stems (any thing new / loose / whatever is never safe around a crafts person) and commented that they smelled like redwood - or perhaps cedar. Smelled one myself - you know - they do smell like redwood? That's not very hard wood - wonder how they lasted as long as they have - there are times I get on those keys pretty hard... Strange... |
| Update #2
Well - it is old... As I wandered up the keys tuning - I had noticed that as I reached the top octaves - the StroboTuner was having quite a bit of difficulty "hearing" the notes. I just passed it off as an old piece of gear - especially the microphone going deaf - as we all are as we get old. Problem is - coming back to the middle of the keyboard to start tuning the bottom - it's still nearly deaf - or so it appeard. The bad thing about old stuff is - that it breaks. Parts wear out, fail, etc. The good thing about old stuff is - that you can reach up on the shelf, grab a tube - and you're back in business. Watching the display I noticed that it wasn't that it was so "deaf" - as the display was being "corrupted". "Looks like 60 cycle getting into the signal chain" I muttered to myself - figuring one of the power supply filter caps was failing - and allowing AC power ripple through to the amp stages. Putting the StroboTuner on the bench - firing up the o'scope revealed nothing really serious on the power rails (less than 5VPP on 412VDC). Hmm. Looking at the output of the display driver yup - 60 cycles "under" the signal. Hmmm. Checking the output of the preamp stage - clean as a whistle - no hum - except me: "Hmmmm". Going back to the plate of the display driver - trash - grid: clean. "Aha". The display driver is a twin triode - 12AT7 - and while the first triode's cathode is grounded - the second one is biased up - and so subject to any filament / cathode leakage - a somewhat common failure mode in old tubes. This leakage was initiallly small enough the signal could easily overwhelm it - but as it got worse - it eventually "swamped" the signal - making it extremely difficult to see the note being tuned. As noted - grabbed a new tube off the shelf (a side benefit of collecting old radios and such) - and the StroboTuner is backworking as it should (Already re-checked the top end - needed a tweak here and there - but basically OK). Sherry's in the kitchen running some appliance that is less than quiet- so tuning will resume - ah - probably tomorrow... ¡Mañana, mañana, siempre hay mañana! (oops- did my Los Angeles slip out just then?). |
|
|
| Update #3
It's done. |
 |
|
And happily - maybe it's just my ears getting old - but this is the closest I've come to being happy with my tuning of my piano. It sounds pretty good - oh sure - there are still some beats in some chords that shouldn't be there- but the real "good enough" is that it sounds good against the Hammond. Sherry and I just spent more time playing together than anytime in recent past. One or the other would play the piano or the organ - but seldom together. This afternoon rocked! OK - with Sherry on the Hammond it was more hymns, etc. than rock - but hey there were a couple of honest to goodness Hammond /Piano jams that were a real treat! We'll have to work up some "stuff"... All the keys work - none stick and all the dampers now "silence" their respective strings. The music desk backboard now tips out when the key cover is folded back into the piano; both it and the key cover "stop" where they should (rubber bumpers replaced); the music desk back-board no longer "draggs" on the lid (again worn rubber bumpers replaced); the only thing left (besides getting a pro to tune it eventually) is the bench. After all these years - the glue is failing - and I better fix it before it (the bench) fails - with me on it!!! Wouldn't be pretty! |
| Back to Home Page |
|
|
| © 2012 Common Cents Computers |