Model 28 TTY project...Part Four - the work continues... |
 |
| This seems like a good time to clean the transmission. (Note to self: next time you use the Dremel to elongate some mounting holes on an aluminum chassis - take the flaming thing OUTSIDE!)... |
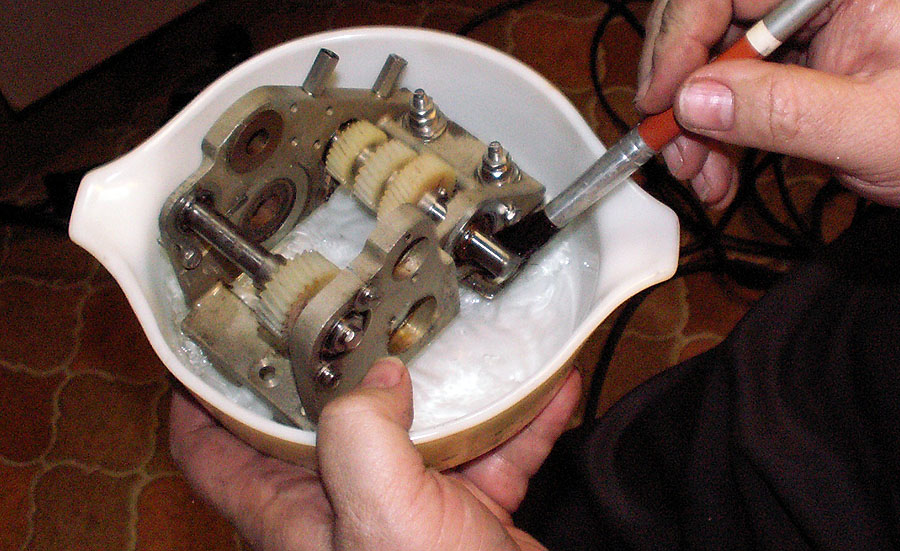 |
| Well - I probably would have cleaned the thing anyway - but that was pretty dumb. My earlier measurements showed I needed to be able to move the transmission about a quarter inch further towards the front than the current slots in the chassis would allow. A few seconds with a small mill tool in the Dremel (the one mounted in a router attachment) and the slots were a quarter-inch longer than before. Of course - now there was aluminum snow all over any and all parts in the vicinity. |
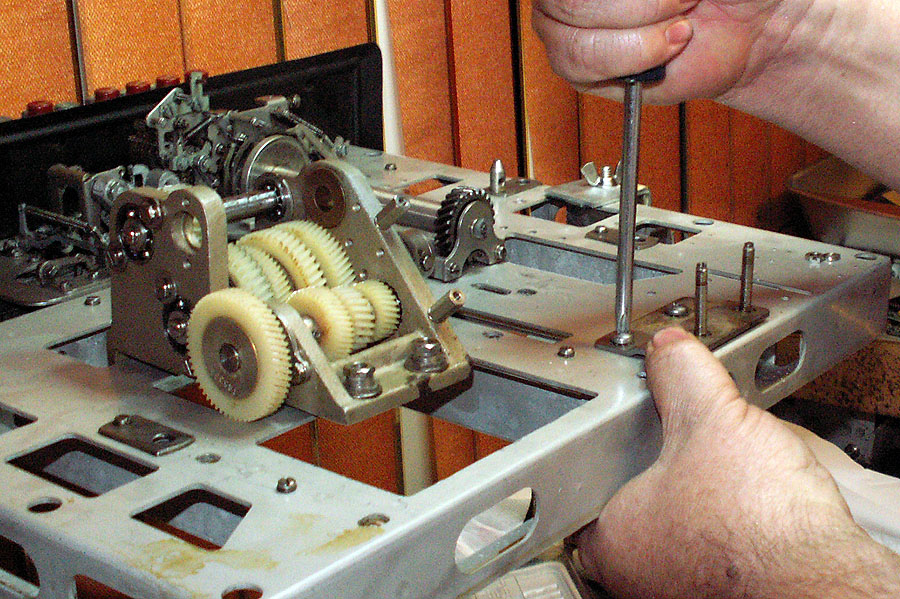 |
| That didn't take too long. With the slots now elongated - the mounting hardware for the transmission is installed. The hardware allows for some front to back movement - along with vertical movement to allow the gears to properly mesh. |
 |
| The transmission drops down onto it's mounting hardware... |
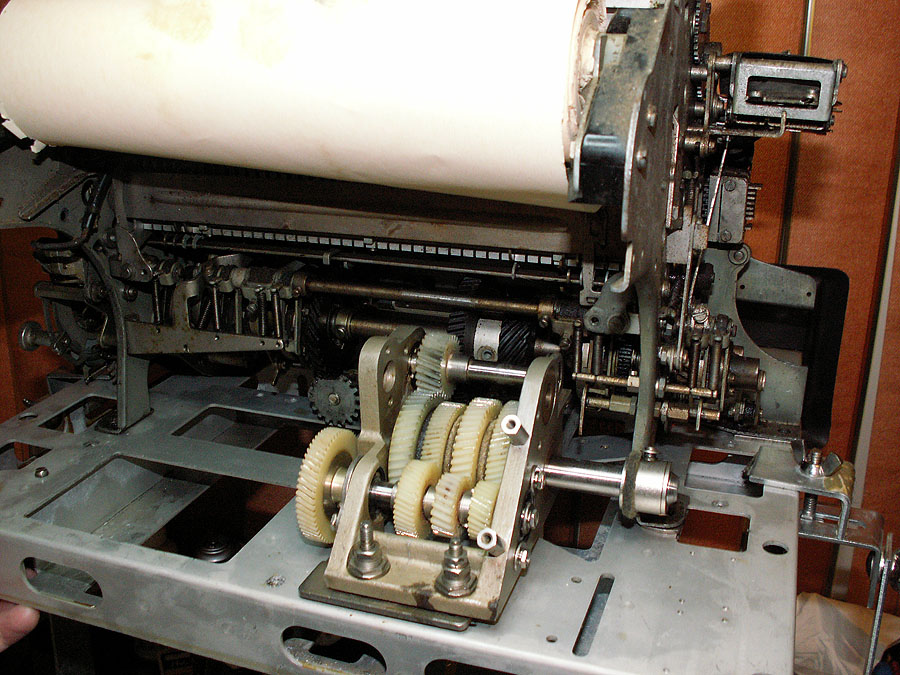 |
| and the old Automatic Typer is installed to check the alignment and mesh of the gears. Front to back and height is fine - though I might consider moving the transmission about a quarter inch to the left (from the front - or right as you view it here). While the drive gear does contact about 95% of the driven gear on the mainshaft - it is on the edge of both gears - and I'd like them more centered. I have enough adjustment in the back - but I need to enlarge the hole in the chassis a bit to accommodate the move there. Before I do that - I need to check to see where the motor pinion and the input gear on the transmission mesh. Project for tomorrow. (Reminder to self - be sure and pay attention to the Note to Self above when elongating that front slot...). |
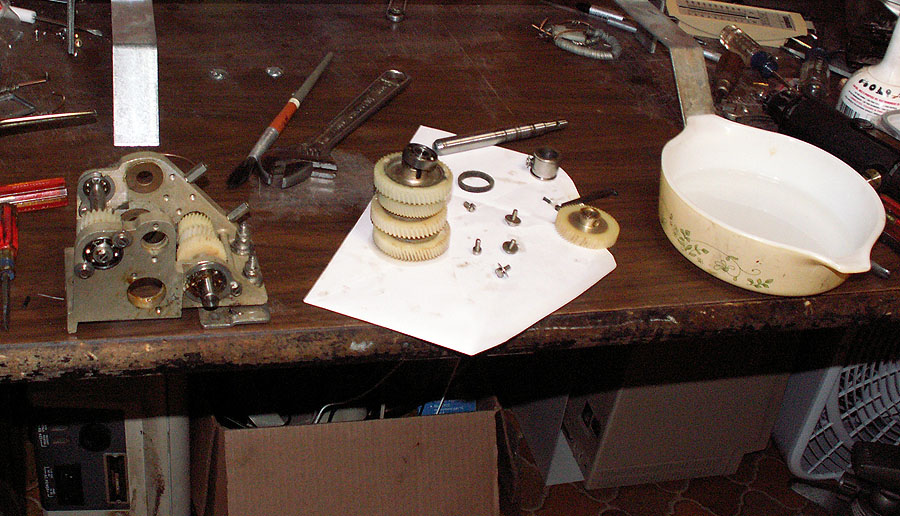
| After consulting both the Greenkeys list - and several friends that know about such things - I settled on Lucas Tacky Red grease. Strange stuff - and quite likely over-kill for a teletype - but it's not that expensive - and it's easy to work with. |
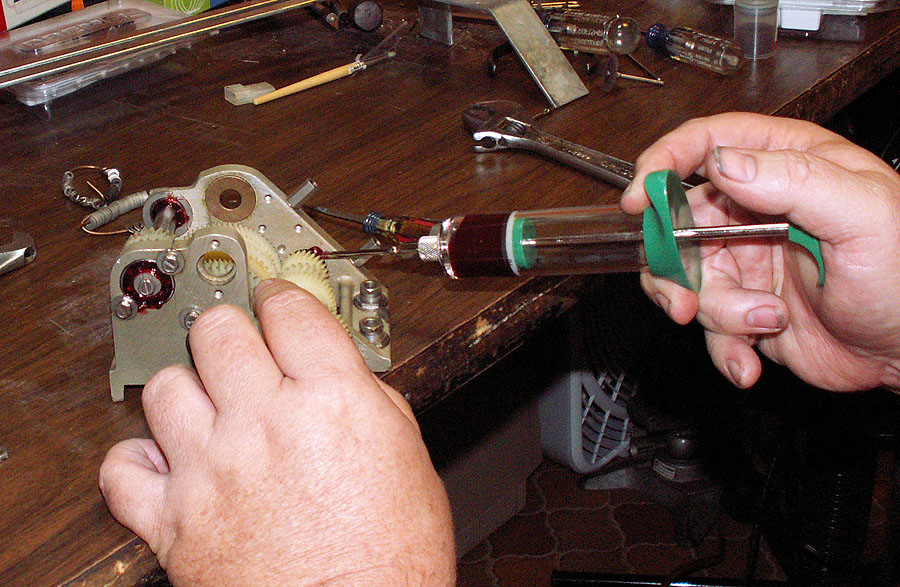 |
| It has excellent characteristics - temperature past 500 degrees, a "Timkin" rating of 60 - which is nearly twice as good as a good quality general purpose grease. However - unlike a lot of heavy-duty greases - this stuff has a nice buttery texture that can be pushed through a large needle. A basting set made for kitchen use works very well to help force the grease into the bearings and other tight places that it would be much harder to do by hand. |
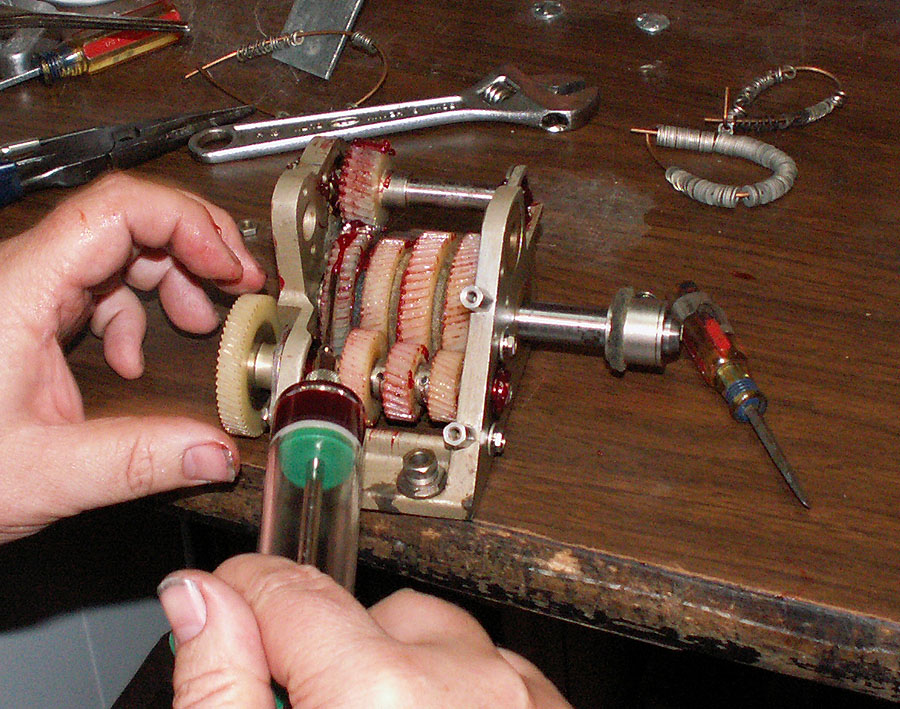 |
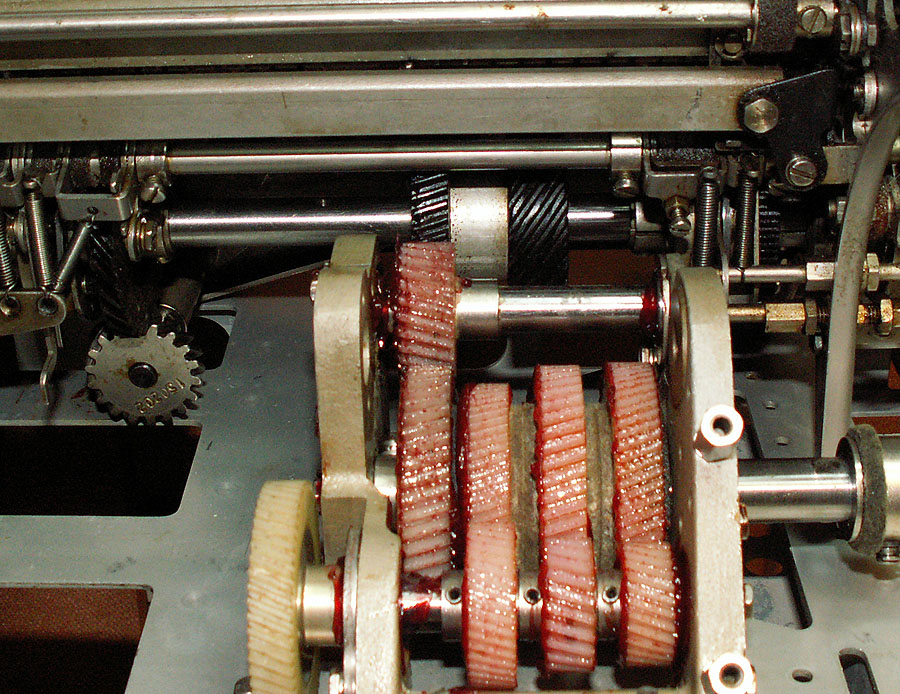
| With a light coat on the gear teeth, the gears run very, very quietly, and smooth as silk. So far I'm quite pleased with this product. |
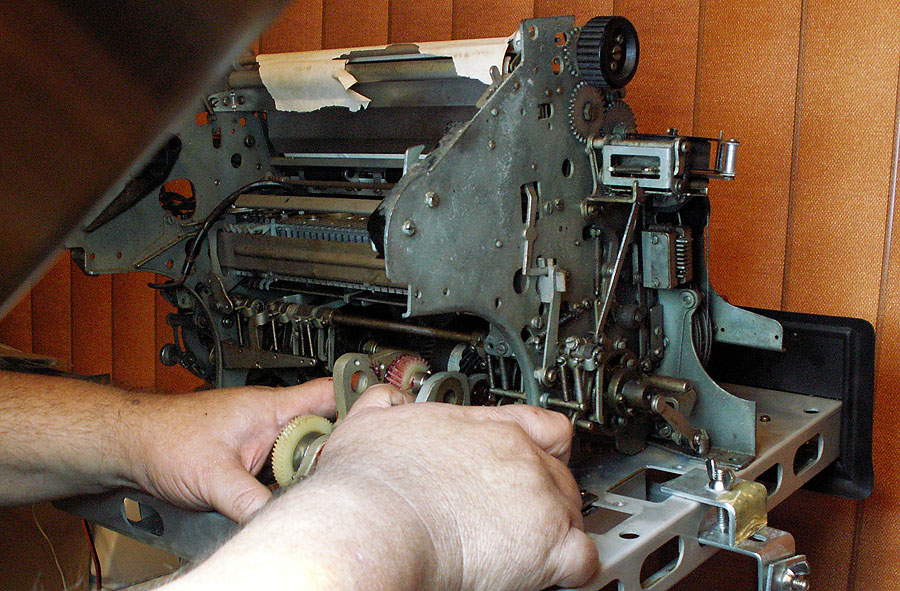 |
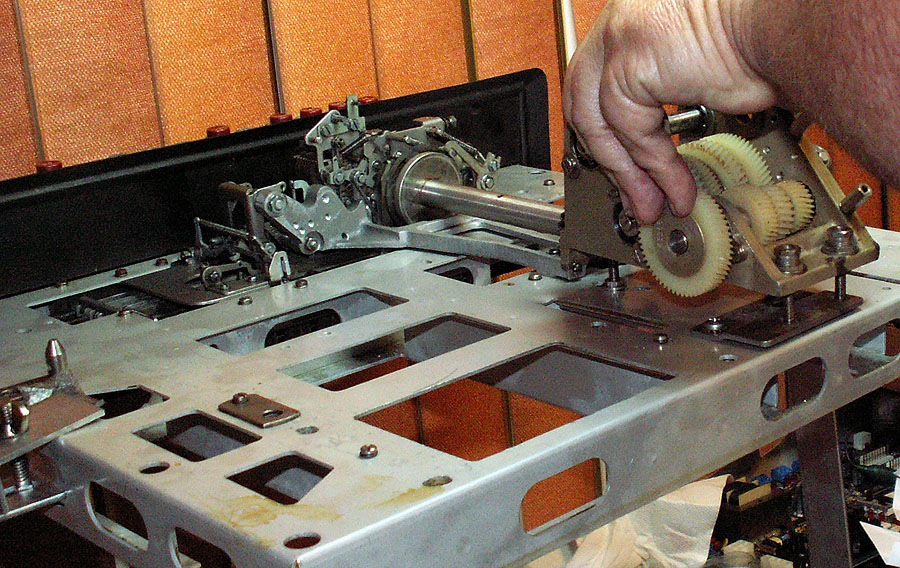
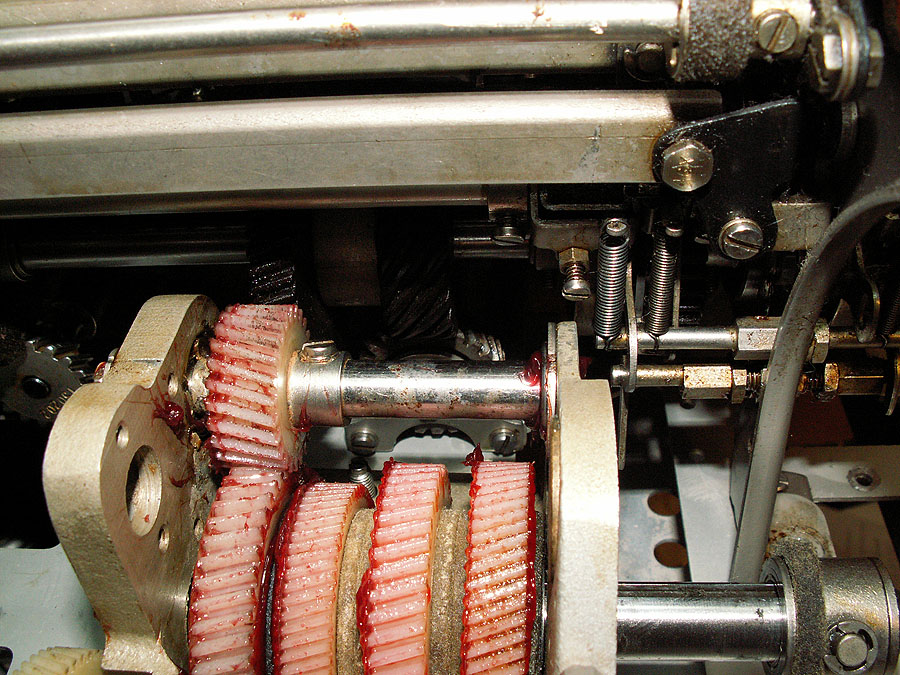
| With the mounting slots for the transmission elongated a bit to the right - the transmission is installed back on it's mounting hardware to check the alignment and mesh with the driven gear on the main shaft. |
 |
| The motor change-out (from the compact's mount to the "standard's" mount far enough along to check the alignment and mesh between the motor's gear and the input gear on the transmission. The rear of the transmission needed about one-eighth inch up adjustment to contact mesh properly. Note also now the transmission's output gear and the input gear on the main shaft are now properly aligned. |
| Here is a short (10 second) video of gears spinning... |
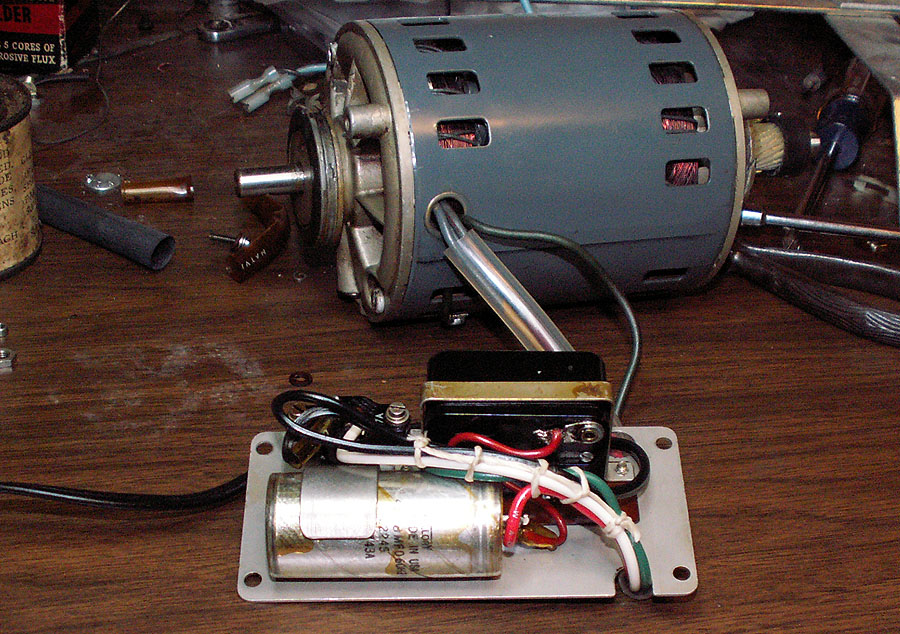 |
| With the components "front mounted" in the compact, the motor wires are shorter - so they needed to be extended. After running through new tubing; and being connected to the appropriate terminals - the wires are then laced down. |
 |
| Then the sub-chassis assembled into the lower section of the motor mount bracket. |
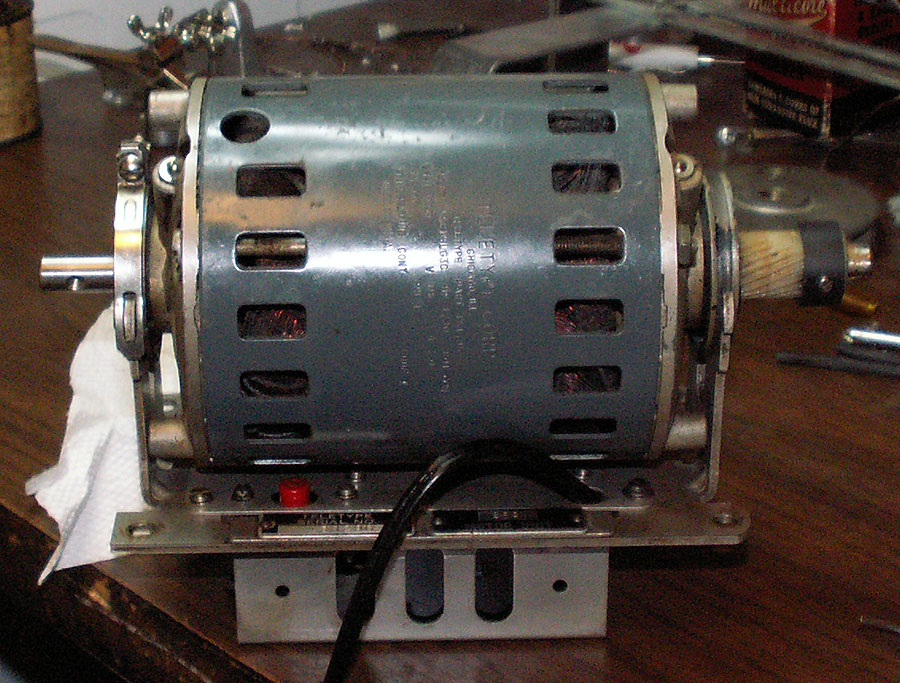 |
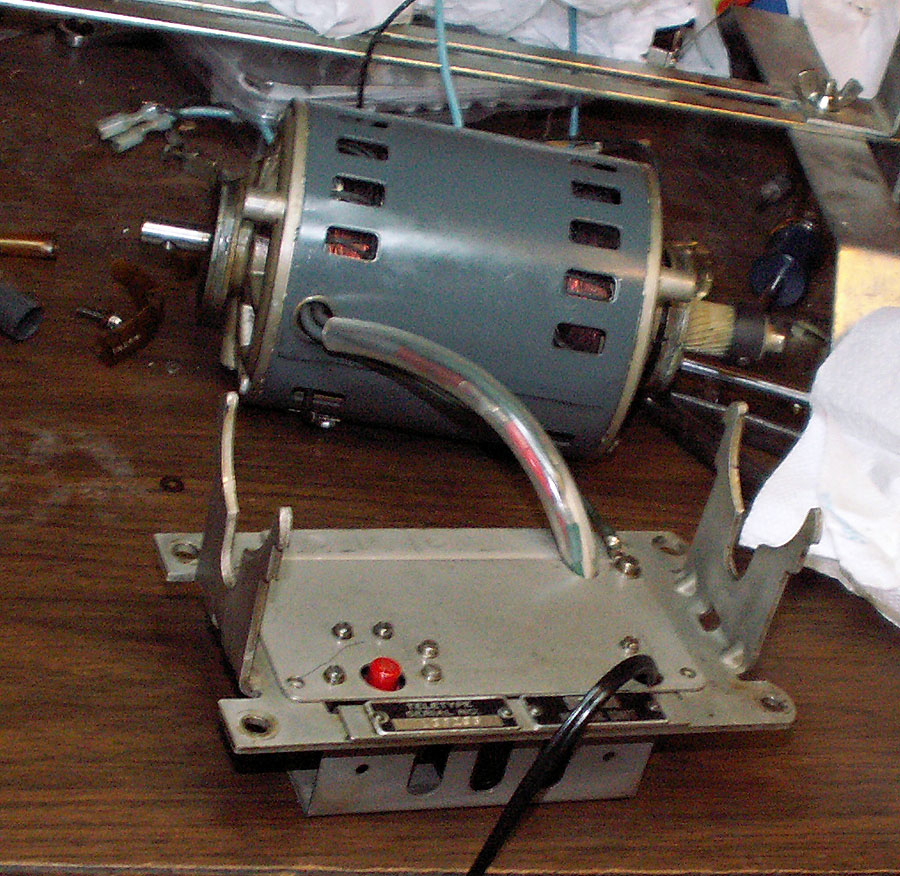
| Motor installed in it's brackets... |
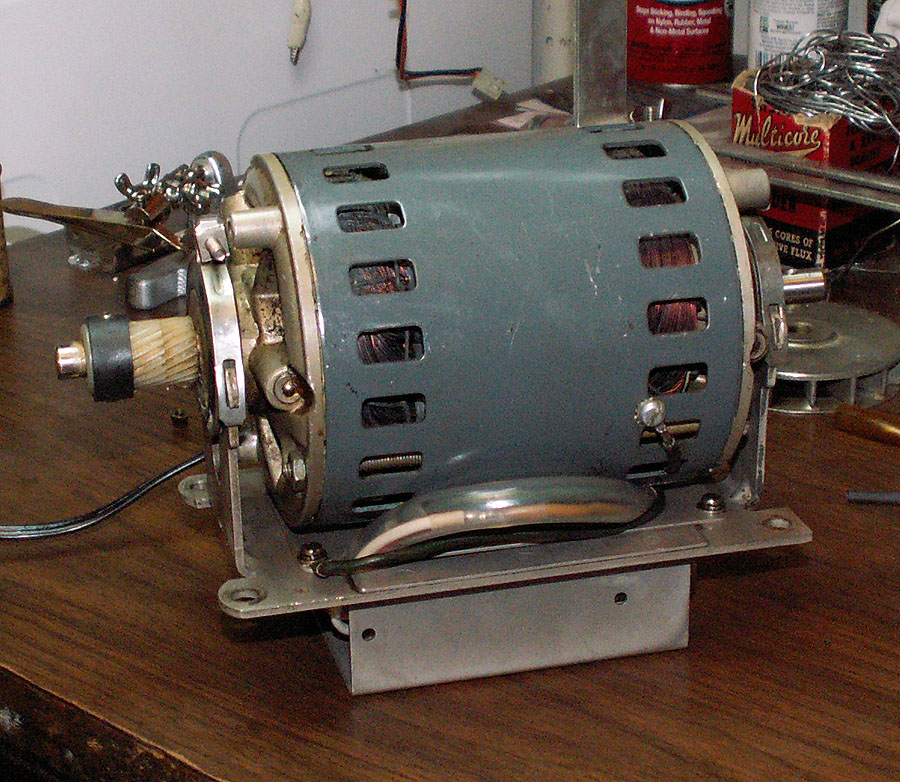 |
| Wiring dressed in the front. One of the "Western-Union splices" can be seen in throught the clear tubing and heat shrink. |
Short video of motor powerup after move and installation of new components 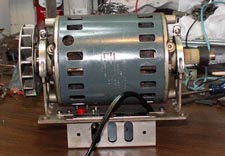 |
 |
| Object of this exercise - change out that middle gear - and move it to the location now occupied by that endstop. reason? 1) The gear that's there - while the right size / teeth, etc. - it's in the wrong place to mesh with the drive gear on a standard keyboard (remember - this autotyper is from a compact RO - so no provisions for a keyboard - and some things are "scrunched". 2) We also need a keyboard drive gear - to power our keyboard. |
 |
| The process is started by removing the type box clutch, the bearing keepers, disconnecting linkages, and clearing parts out of the way - such as the spacing drive spur gear. Loose ends - such as clutch stop arms, and such are tied up out of the way - and a couple of tooth-picks get inserted into various points around the selector cam assembly - to hold the eight followers off the cams - and allow it to be removed without taking a chance on bending, etc. |
 |
| Many pictures are taken at various points (several dozen) to use as a reference during re-assembly. No matter how good (or bad) whatever manuals you may have are - there is nothing like lots of pictures of the actual unit you are working on. There is something to that old saying "a picture is worth a thousand words" --- however - I tend to think of that saying as "a picture will save a thousand cuss words" when it comes to operations such as this. |
|
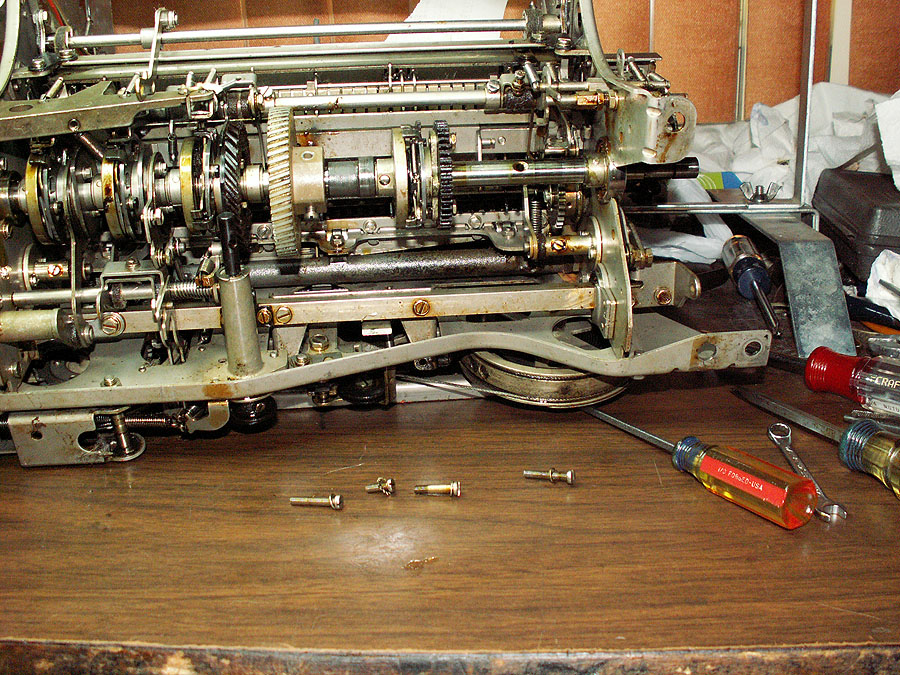
| The linefeed clutch assembly, the end-stop collar, and the input (driven) gear all have their screws removed so they can be slid as far as possible to provide as much space as possible to slide the entire main shaft to the right to clear it from the selector assembly at the left. Once out - the gear exchange takes just a couple of minutes - and the shaft is slid back into place - and the dissassembly procedure is reversed. |
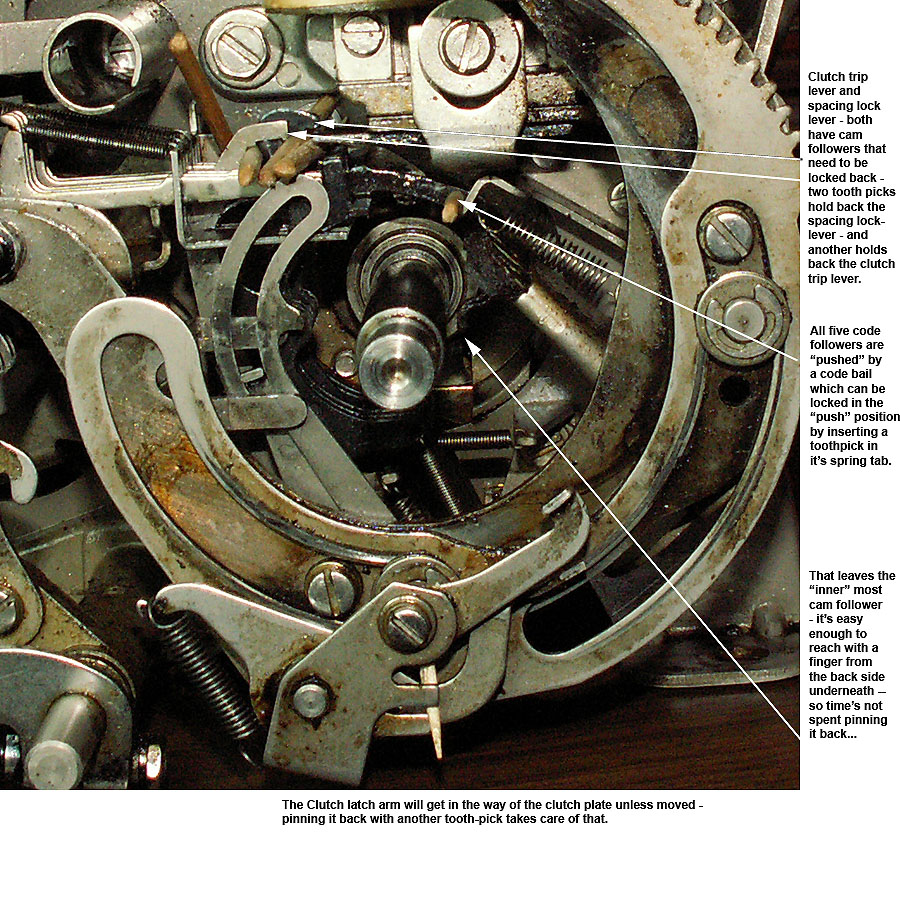 |
| Toothpicks "applied" at strategic points makes inserting the Selector cam onto the main shaft a much easier task. It also makes it much less likely that anything will be damaged. |
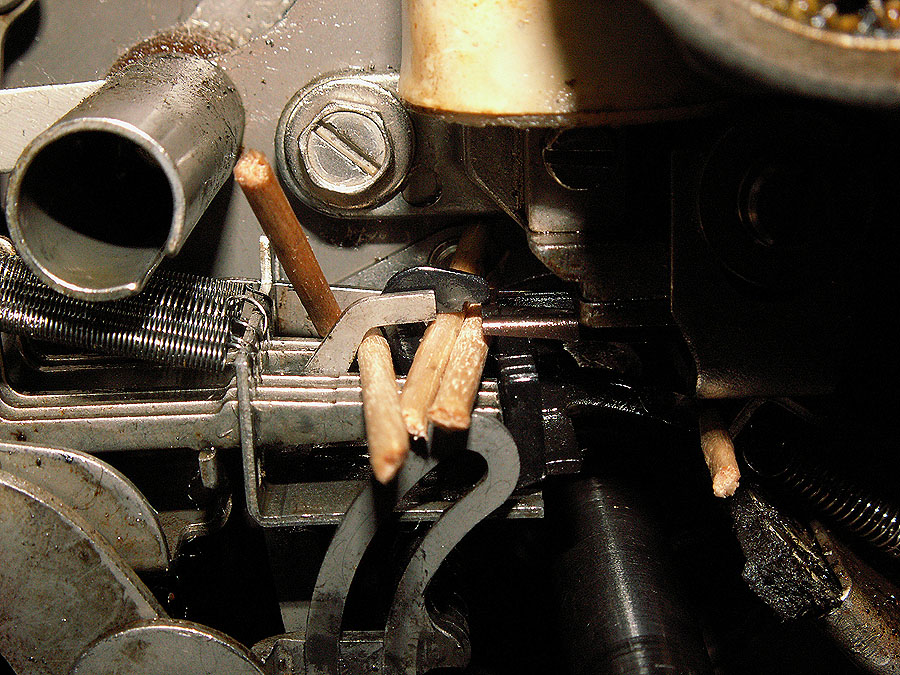 |
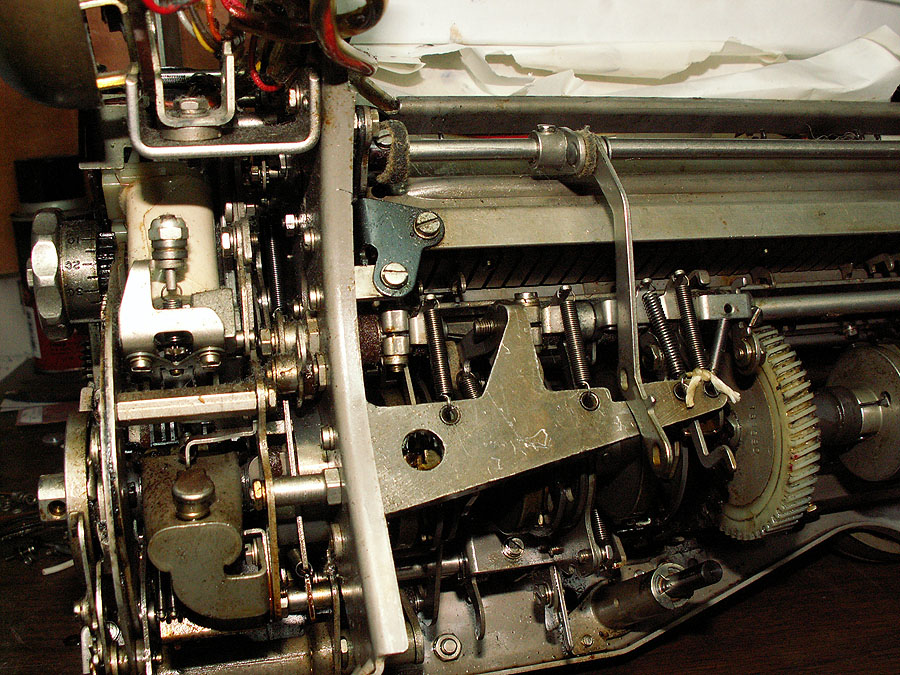
| Here is a close-up of several of tooth picks. note the "fourth" toothpick in the rear... that's another follower - (IIRC it's the cycle/code bar clutch trip lever). |
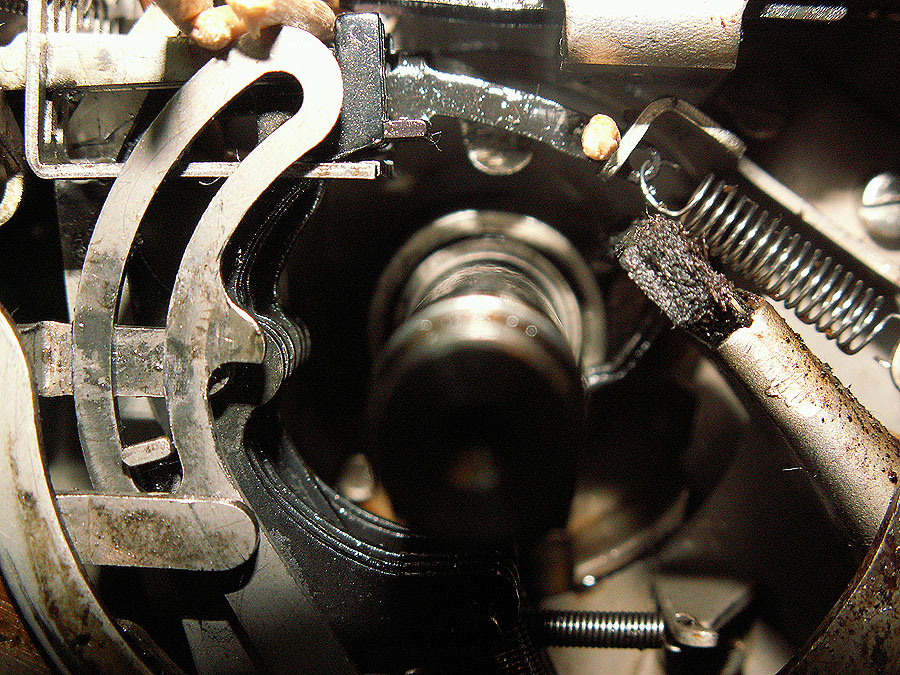 |
| Here is a close-up looking along the main shaft where the selector cam usualy resides. - note all eight cam followers are out of the way - though the very back follower / lever is still in the way (seen on the right - just this side of the thrust sleeve). Again - this lever has an "extension" that is easily reached with a finger just as the selector cam assembly goes into place. |
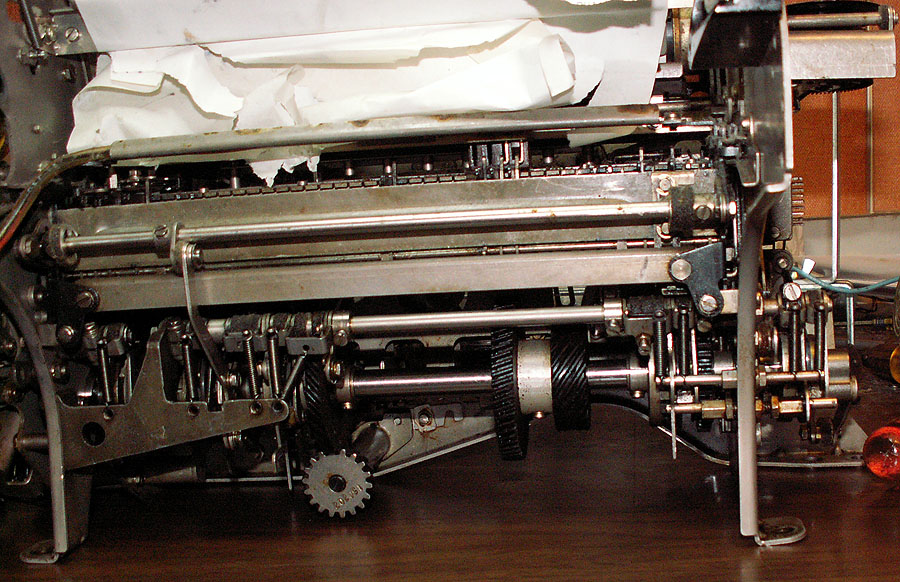 |
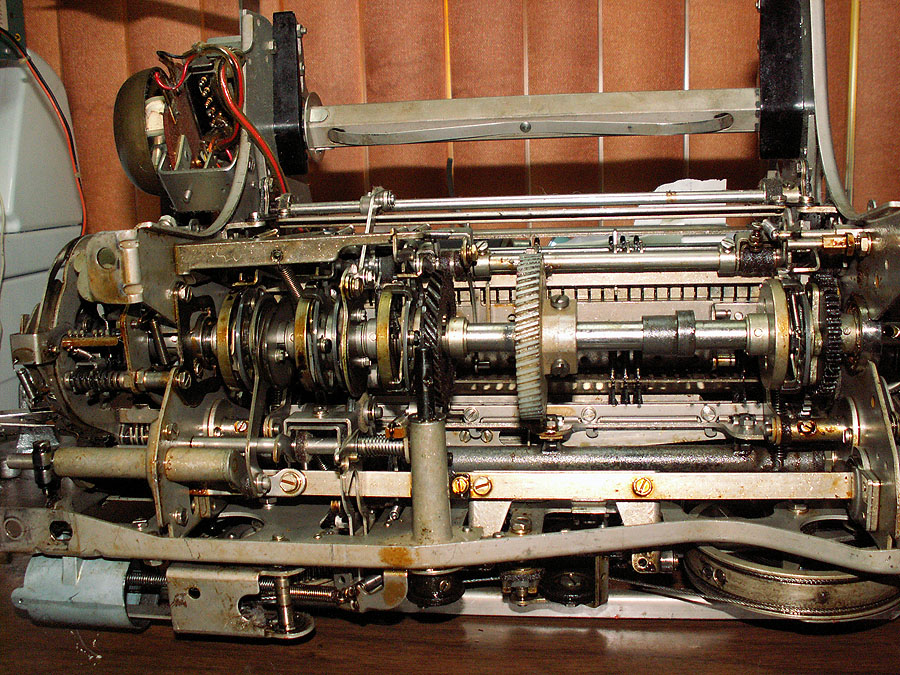
| Soon it looks like a 28 Auto-typer again - rather than a pile of parts. . Note the new position for the driven gear - and it's companion keyboard drive gear. |
 |
| Of course - it'd be nice if indeed the gears line up as anticipated - all the measuring, checking, etc.is fine - but seeing the gears properly meshing is even better! |
 |
| One more thing to check - and indeed the keyboard drive gear meshes with the keyboard spur gear just fine. So we've gone from an RO compact - to --- a pile of potential... In spite of temptations otherwise - there are a bunch of adjustments, and alignments to set and check before this thing gets powered up. A bit of impatience here could be disasterous.. . I'll admit though the thought did cross my mind for a moment... |
|
|
|
|
| Site contents copyright © 2008 Randy Guttery |
|
|